


Making Issue No. 7 / Tool Roll - Tips

When it comes to working with thicker fabrics like canvas, sometimes the idea of it can seem like a bit of a challenge. So today I'm sharing a few things that I've found to be helpful when sewing with fabrics like canvas!
Instructions for the Tool Roll designed by Arounna Khounnoraj can be found on pages 33-36 of Making Issue No. 7 which includes directions to sew both a leather and fabric version.

Needles
If you are sewing thicker fabrics like canvas, it is often recommended to use a needle meant for denim. The tip of a denim needle is a medium ball point shape and has a reinforced blade, making it easier for the needle to glide through several layers of thicker fabric and avoid breaking or skipping stitches (according to the Schmetz ABC Pocket Guide). Because I only used canvas on one side of the tool roll, I was able to use a Universal Needle without any trouble. However, if I had used canvas on both sides, I would have chosen a Denim Needle.
Stitch Size
After experimenting with stitch sizes, when it comes to thicker fabrics, I've found 2.8 to work well for the projects I've completed, just like this tool roll. Even with thicker materials, 3.0 seems to be too loose, and 2.5 can be challenging to take out if I need to redo a line of stitching. I've been sticking with 2.8, and it's working well for me.
Fabric Deviation
For the tool roll pictured here, I chose to use the Fray Print Canvas Fabric that was released with Making Issue No. 6 on the exterior instead of the interior because I wanted to highlight the beautiful fabric. For the interior, I used a simple Kona Cotton. If selecting a thinner fabric for the interior, it's essential to stabilize it in the back since all pockets will be attached to it and the fabric will suffer much wear. I used fusible interfacing along the entire backside of the main lining piece to give it some support.


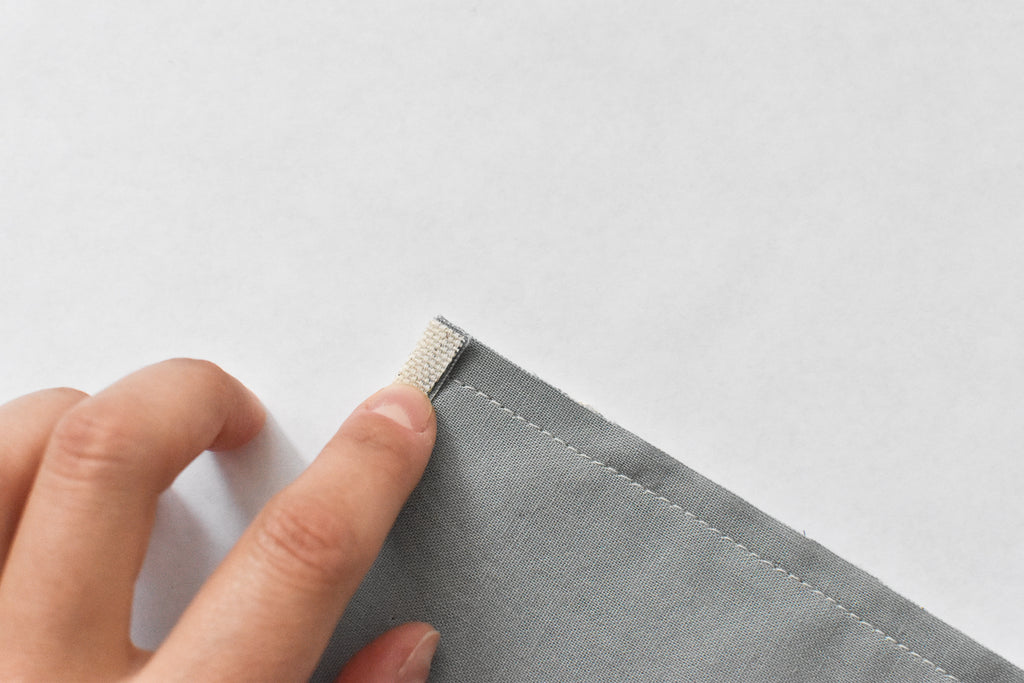
Turing Corners on Thick Fabrics
This small step often seems to be one of the most challenging things in any sewing project for me, even when it comes to thinner fabrics. It wasn't until my grandma showed me a little trick that I was able to move past my frustration with this step. Below, I'm showing three methods I used for turning corners on this project. Each produced slightly different results, and if I had used different fabrics from what is shown here, the results would also vary. I'd encourage you to give each a try to see what you like best and what works best for the fabrics you're using. Also, make sure you have a point turner nearby because this will come in handy!
Method One
After you've sewn a line of stitching around a corner and before you turn the item inside out, fold the seam allowance on one side inward and iron flat, then do the same for the other edge. You should have a nicely pressed corner still right sides facing inward. Then press your finger on top of the corner, holding the ironed edges in place as you turn the item right sides out. Use your point turner to push out any extra fabric still bunched inside. You can also use the tip of a pin along the edge to pull out any areas of fabric that may still be bunched into the corner. Then iron flat.

Method Two
You can also combine this step of ironing with a method of clipping the corner. Clip the corner first by cutting a line down toward the corner point. Fold one edge inward and iron flat, then cut off the extra tip of fabric that overlaps the line of stitching (if left, this will bunch up and make it difficult for your corner to lay flat). Repeat with the second edge and turn inside out as directed in the previous method, use a point turner, then iron flat.


Method Three
Another method is done by clipping off the entire corner whereby you cut off a little triangle close to the line of stitching that makes the corner's tip. Then, just like in the previous two examples, fold the seam allowances inward and iron before turning right sides out. After your corner is turned right sides out, use a point turner, then iron flat.


Pins and Clips
Some of my pins were not thick enough to penetrate the two layers of fabric, so sharp pins are essential when working with thicker material. Additionally, around edges and places where several layers of the thick fabric meet, sometimes pins aren't usable. In this situation, sewing clips are very helpful.

Grommets & Eyelets
Are you wondering what the difference between a grommet and an eyelet is? Before starting this project, I did too! They look very similar after being installed, but grommets are intended for more heavyweight fabrics, while eyelets are used for most lightweight fabrics. I practiced installing a few eyelets with the combined thickness of the two fabrics I used and ultimately decided it would work well. If I had used canvas on both sides, a small grommet would have been best.

If you have any tips for working on this project or with thick fabrics, we'd love to hear them. Share your suggestions in the comments below!